Introduction
Step-by-step guide on how to configure your mosquitto MQTT broker and P1IB/WiMBIB devices with encrypted MQTT communicaton.
By utilizing encrypted data over MQTT, it is more safe to transport information over the internet.
Pre-requisits
The quide expects you that you have a Ubuntu or Debian based installation with mosquitto installed.
Certificate
Certificates needs to be either generated locally (self signed) or aqcuired by a service. One (the?) most popular free certification service is LetsEncrypt (https://letsencrypt.org/).
If you want to use LetsEncrypt, visits https://letsencrypt.org/getting-started/ and follow the instructions. Note that letsencrypt does not generate per device/client certs and keys, its primary meant to be used for web servers. You can use it for the server side TLS, but not for mutual TLS. For that you need to use your own CA for client certs.
If you want to use self signed certificates, then continue to the next chapter. Otherwise you can skip to the next one.
Generate Certificate (self signed)
To be able to generate certificates, you need openssl installed.
$ apt install opensslWhen installed, lets continue with the generation of certificates.
First you need to figure out the host of where the broker is running. It could be the machines hostname or its IP. It needs to be correct, otherwise the TLS handshake will not work later on.
This bash helper script can be added into a file, for instance ‘generate-certs.sh”.
Note the variables on the top with different CN names. These needs to be filled in by you.
#!/bin/bash

CN_CA="serverCA"     # can be whatever
CN_CA_HOST=""        # must be the host machine ip/hostname or domain
CN_CLIENT="P1IB"     # can be whatever, but in this example we just name
                     # it P1IB

# generate CA private key
openssl genrsa -out ca.key 2048

# generate root CA certificate
openssl req -new -x509 -days 3650 -key ca.key -out ca.crt -subj "/CN=${CN_CA}"

# generate server private key
openssl genrsa -out server.key 2048

# create cert signing request (CSR) with that key
openssl req -new -key server.key -out server.csr -subj "/CN=${CN_CA_HOST}"

# sign the CSR with the CA private key
openssl x509 -req -in server.csr -CA ca.crt -CAkey ca.key -CAcreateserial -out server.crt -days 3650


# repeate the same thing to create the device/client certs and key
# by using the CA for signing
openssl genrsa -out client.key 2048
openssl req -new -key client.key -out client.csr -subj "/CN=${CN_CLIENT}"
openssl x509 -req -in client.csr -CA ca.crt -CAkey ca.key -CAcreateserial -out client.crt -days 3650
Run this script (chmod +x generate-cert.sh && ./generate-cert.sh), if sucessfull you should end up with the following files:
ca.crt
ca.key
ca.srl
client.crt
client.csr
client.key
server.crt
server.csr
server.key
Configure Mosquitto Broker
Add the following lines into your mosquitto broker configuration.
Note that in this example the certificates are located in the /certs folder, running inside a docker container. You need to change this to wherever your certificate files are located in your filesystem.
This configuration enables mutual authentication from the certificate and device/client key:
cafile /certs/ca.crt
certfile /certs/server.crt
keyfile /certs/server.key

require_certificate true
use_identity_as_username true
Save the file and restart your broker.
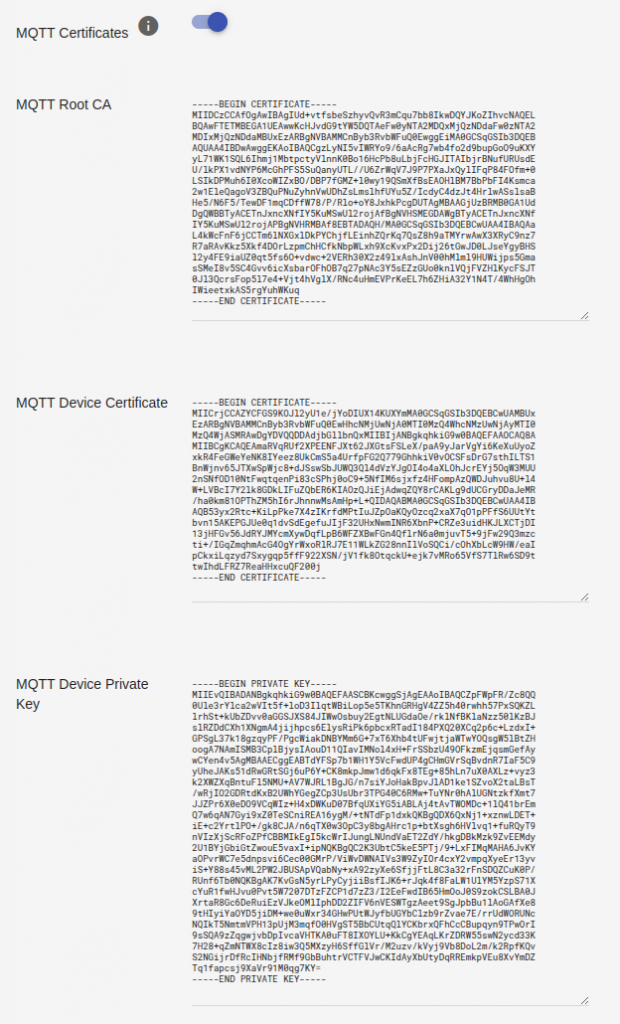
Configure your device (P1IB / WiMBIB)
Go to the settings page on your device.
Enable the “MQTT Certificates” option and fill in all content of your ca.crt, client.crt and client.key files into the fields.
Save and restart.